« Proportional Flow Control Valves
Disassembling and Cleaning the CV93 Valve
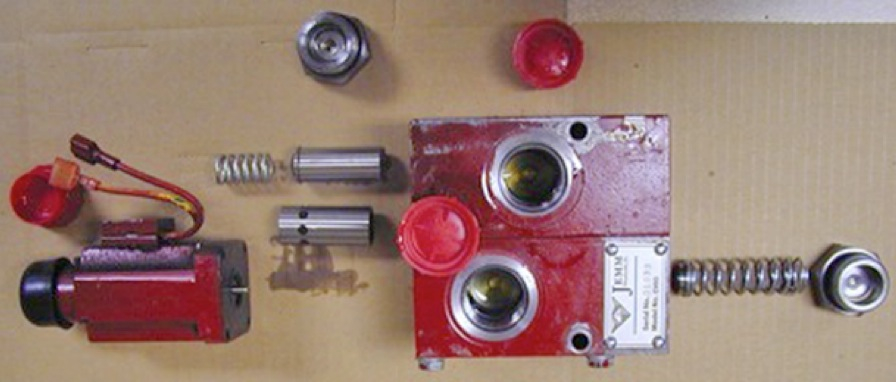
The Followng directions detail the process of cleaning a CV93. These steps ensure longevity for your valve as wear on the unit will cause decreased quality over long periods of time or use. Performing the following operation will make the warranty on your CV93 null and void. Attempt this process with care and utmost attention to detail of the instructions provided.
CAUTION! When disassembling this valve, be sure to take it apart in an conscious and organized manner. It is very important to put it back together in the exact, original order. If one part is put back in the wrong way or is missing, the valve will not work properly. Be sure the spools are inserted into the valve in the same placement as shown. Keep springs positioned as they were prior to disassembly to avoid incorrect placement. Disassembling a valve voids warranty.
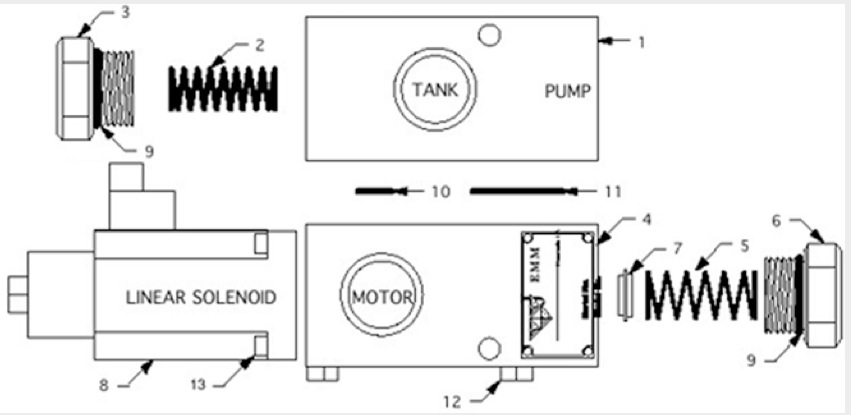
- Compensating Unit Body with Spool
- Compensating Unit Spring XX = GPM of Valve- 15, 20, 25, etc.
- Compensating Unit End Plug
- Metering Unit Body with Spool
- Metering Unit Spring
- Metering Unit End Plug
- Metering Spool Orifice XX = GPM of Valve – 15, 20, 25, etc.
- Linear Solenoid XX = Valve Supply Voltage 12 or 24
- O-ring – for #12 SAE straight thread connection. Parker 3-912 N674’70 or equivalent.
- O-ring-1/4″ I.D. x 3/8″ 0.D. Parker 2-010 N674-70 or equivalent.
- O-ring – 7/8″ I.D. x 1″ 0.D. Parker 2-020 N674-70 or equivalent
- Bolt – Grade 5, 1/4-20 x 2.5
- Bolt – 10-24 x 3/4 Socket Head Cap Screw
Process of Disassembly
- Remove 4 screws (#10) that attach the Linear Solenoid (#11) to the valve (#1).
- Remove the steel end block (#2) holding the spring (#5) opposing the solenoid pressure on the pilot spool. An orifice fits into the open end of this spring.
To Clean:
- Use a 3M Wetordry sand paper (which can be found in auto stores) or similar product with 600-1200 grit. A grit of lesser value will cause groves and ruin the valve. A higher grit will not remove the tarnish film effectively which is what the cleaning process is designed to accomplish.
- Reassemble Notice: Disassembling valve voids warranty. Follow these directions closely.